Academics > Subjects
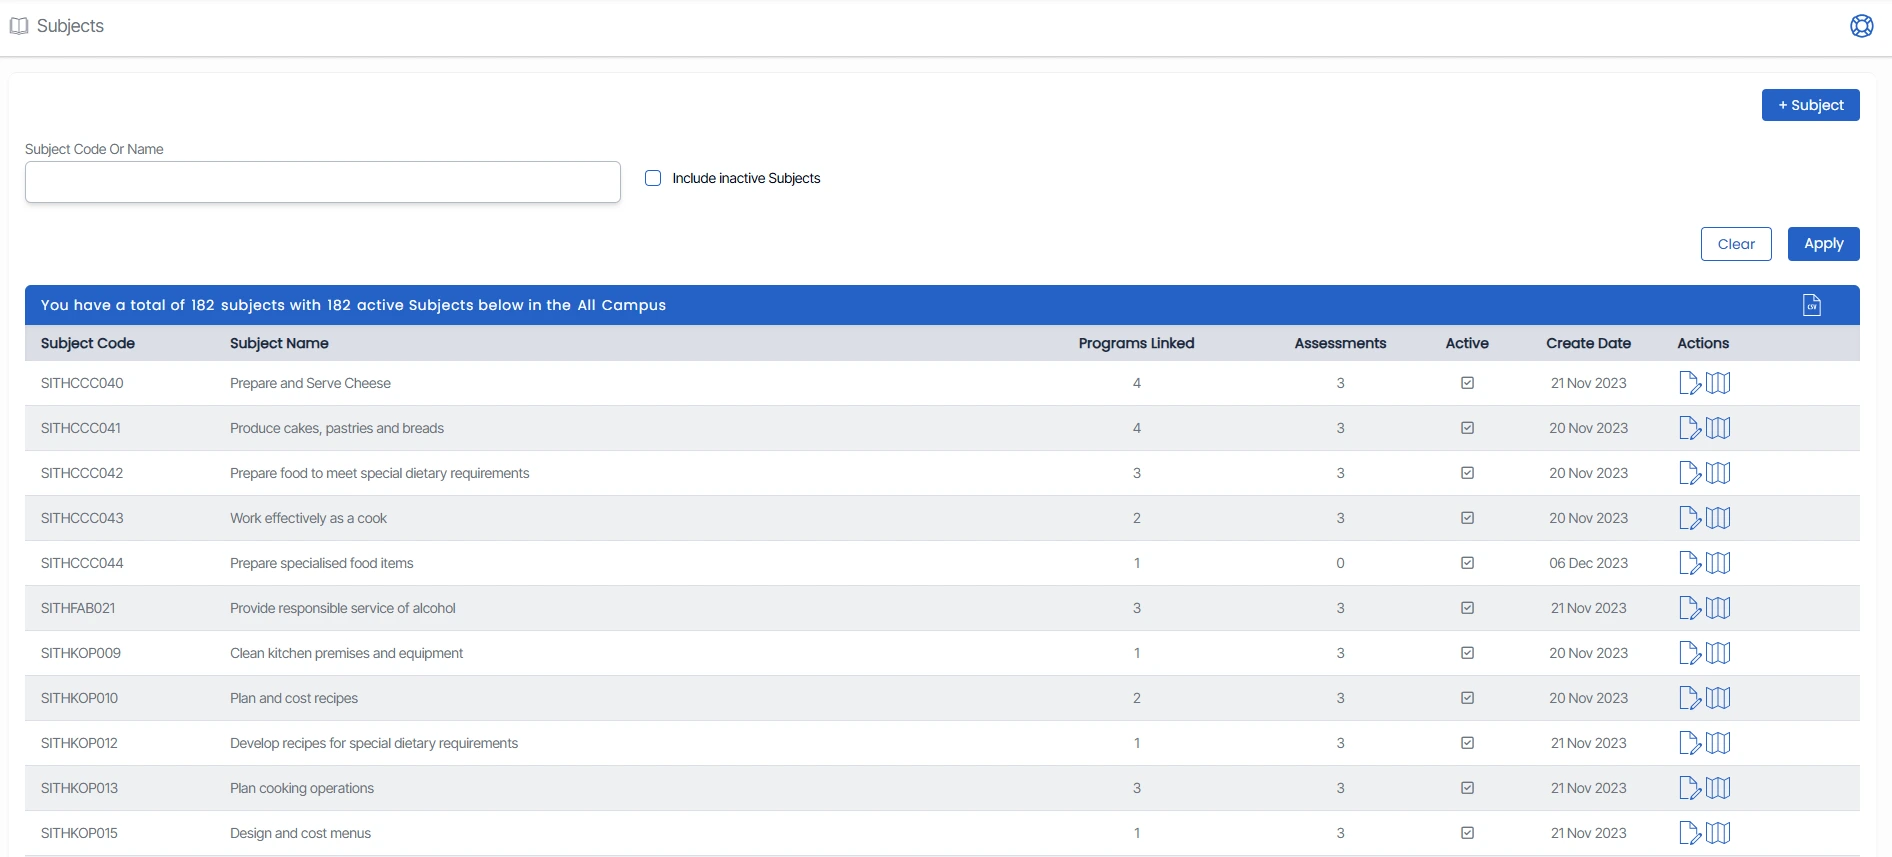
The Subjects welcome screen will show you the total number of subjects with the total number of active subjects for all the campuses.
To find a particular subject, you can search for it using either its code or name. If you want to see subjects that are no longer active, you can choose to include them in your search results by ticking a box and clicking the apply button. This can be useful when you need to manage both active and inactive subjects.
The +Subject button is a quick-access feature that allows you to add a new subject to the system. When you click this button, it redirects you to the Subject Entry Screen, where you can input all the necessary details for the new subject.
IMPORTANT - It is recommended that when creating a new subject, check whether the subject is already in the system and is superseding with the new subject code.
To do this, search the subject by the subject name in the search field. If the subject name is already in the system with the old subject code then you need to create the subject with the New Subject Code and Name from the Subject Entry Screen.
Once you have created the Subject, come back to the subject welcome screen, search the subject with the subject name, and the system will show you both the old and new subject in the grid. There you need to go to the old subject's supersede icon,
and the system will show you a pop window, where you can search and add new subject and save. This will supersede the subject with the new subject.
Once you have done this, you will be presented with a new supersede icon. which will show you that this subject has superseded the old subject (with the old subject code).
NOTE - For your upcoming students/enrolments, you will be using the new subject for the program. It recommended to untick the compulsory tick-box if it is linked with the Program from the Program Entry Screen.
Icons under the Actions column:
Edit – If you want to make any changes to the subject, you can select this icon to edit the desired subject.
Supersede Subject  – This icon is used to supersede a subject. When you click on this icon, the screen will open the pop window where you add the new subject code and select save.
Subject Supersede – When the subject gets superseded, the grey icon will turn red. Click on this icon and the screen will open the pop window where you can see the superseded subject.

