
Main Dashboard > Short Programs Tile > Short Program Listing screen
Overview
The Short Program Listing Screen provides a comprehensive list of students enrolled in selected specific short programs based on the selected date range.
Note: if you select This Month from the calendar dropdown in the Short Program Tile it will show you a list of all the students who have an enrolment where the enrolment start and/or end dates falls within This Month.
If you want to get an actual total number of students in your college for This Month, you would set this calendar option in the Short Program tile as well as in the Continuing, Starters and Finishers tiles. If you add up the totals from all four tiles, the combined total will represent the number of students expected to be at your college this month.
IMPORTANT: This count is only relevant if you are using Short Programs in the system, if you don’t use them then your total student count in the college is only Continuing, Starters and Finishers counts total.
This screen is divided into two sections.
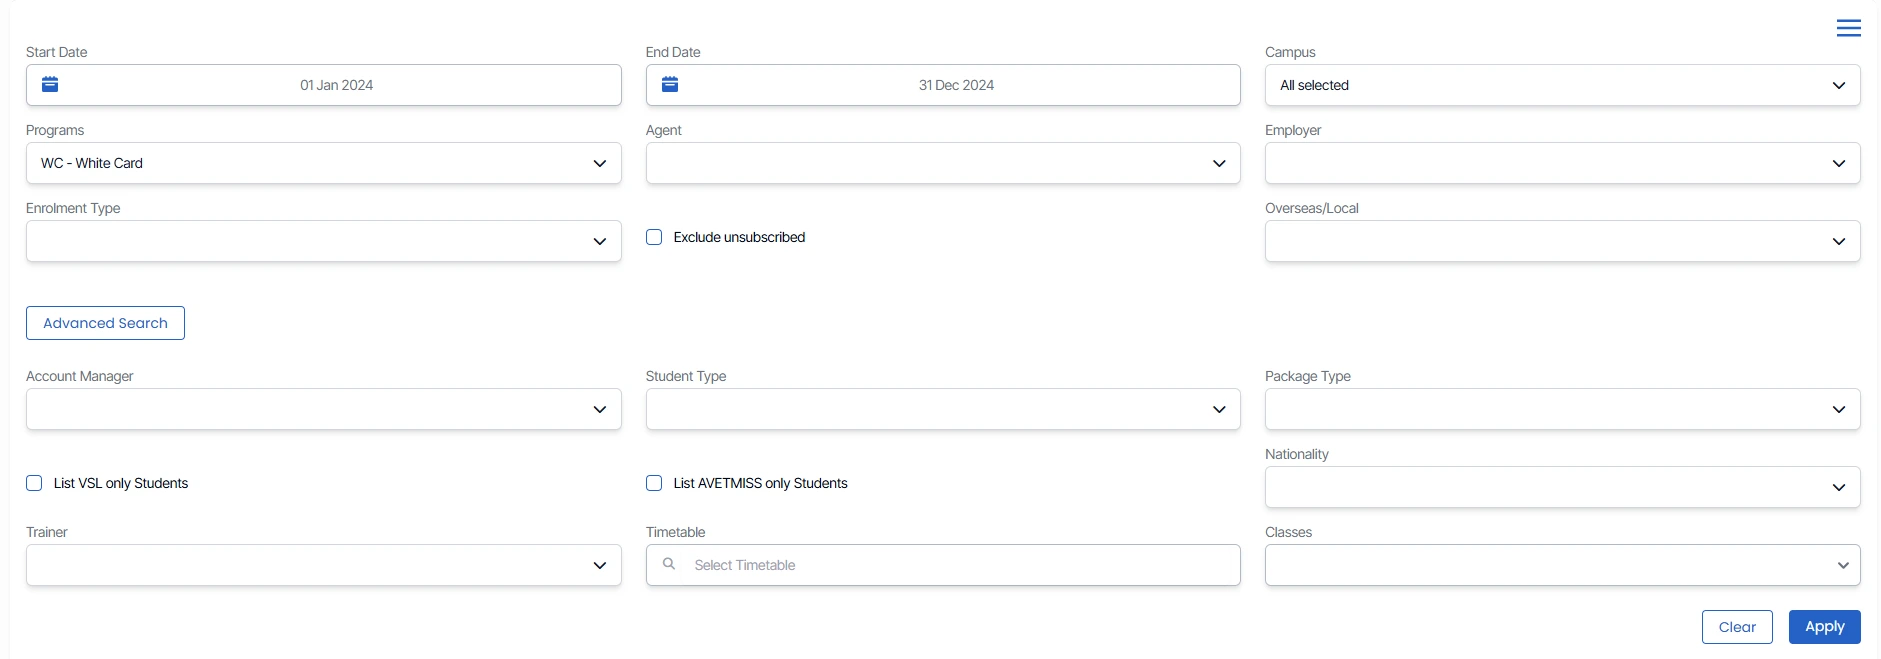
1) Filters/Parameters
2) Listing Grid
Filters/Parameters
The Filters section allows users to refine their search using fields such as date range and other dropdown options. For more precise searches, the Advanced Search button enables input of additional details.
Click here for more information on an explanation of each filter and how you can use it.
Listing Grid
The listing grid displays the populated data in a tabular format. Hyperlinks within the student and enrolment numbers allow direct navigation to the Student Dashboard and Enrolment Dashboard. You can download the CSV report of the list for further analysis.

Steps to select multiple students and carry out bulk actions:
The burger menu, located in the top-right corner of the screen, allows you to efficiently perform multiple actions in bulk.
To use this feature, tick the checkboxes next to the relevant student numbers, then select the desired option from the menu. You can send an email, or SMS, create a contact log, and generate bulk invoices.
Click here to learn more about how to use the burger menu.
There are some icons available on the screen and under the details and action columns, click here to learn more about how to use these icons.
Previous/Future Program Column: This allows you to see, for each student in the grid, if they have a future enrolment to commence after the current one or if before their current enrolment had they completed a previous one with you. If it is a previous enrolment you will see that program code to the left of the / and if it is a future enrolment you will see the program code to the right of the /. Where the student has no previous or future enrolments, only the current enrolment, then you would only see the / in the column for that student.
Successful Results and Total Subject/UoS column: This gives you a count of the total Subjects or UoS linked to the enrolment and how many have a successful result. The total count linked to the enrolment is on the right hand side of the / in the column and the total successful result count is on the left of it.